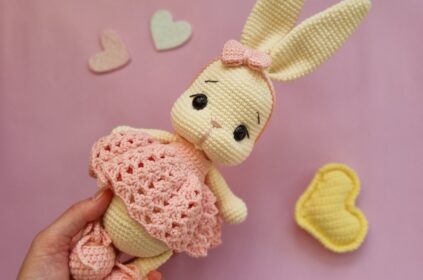
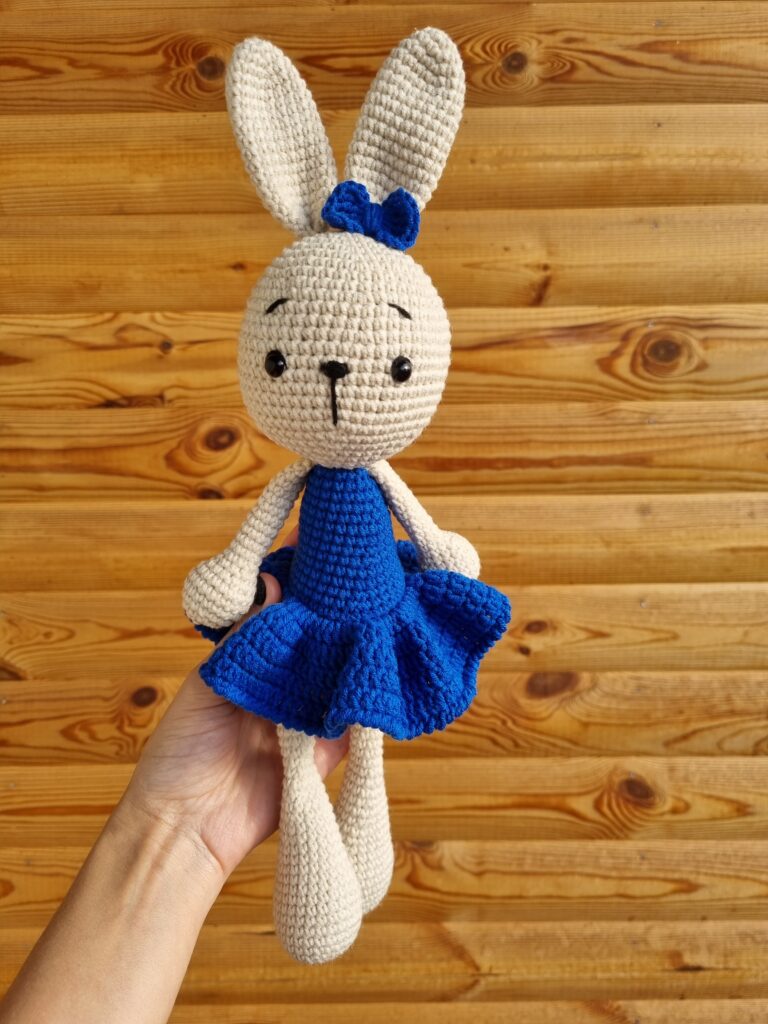
Here is our gorgeous crocheted bunny in dress! She is very tender and would be happy to become your daughter’s best friend or maybe your best friend.
Her dress is lovely due to the reverse single crochet stitch that creates the cord-like effect. Once you’ve learned how to reverse single crochet you will want to decorate every dress with it.
Give this pattern a try and you will be able to enjoy your crocheted bunny very soon!
Finished toy height: about 30 cm (11.8 inches)
Designed by: Julia Deneiga @deneyga_yuly
Materials for bunny:
- Yarn: YarnArt Jeans or Alize Cotton Gold (different colors for the body and dress)
- Crochet: 2.5 – 3 mm, depends on how tight you crochet
- Eyes: 8mm safety eyes
- Sewing needle and scissors
- Stitch marker
- Fiberfill
Abbreviations:
- mr – magic ring
- ch – chain
- sc – single crochet
- inc – 2 sc in the same stitch
- dec – single crochet 2 stitches together
- BLO – back loop only
- FLO – front loop only
- [12] – number of stitches you should have at the end of the round/row
- ( ) * x – repeat whatever is between the brackets the number of times stated
Pattern for crocheted bunny:
Body:
1. 6 sc in mr [6]
2. inc * 6 [12]
3. (1 sc, inc) * 6 [18]
4. (2 sc, inc) * 6 [24]
5. (3 sc, inc) * 6 [30]
6. (4 sc, inc) * 6 [36]
7-9. 36 sc [36] (3 rows)
10. (16 sc, dec) * 2 [34]
11. (15 sc, dec) * 2 [32]
Change to dress color:
12. 32 sc [32]
13. BLO 32 sc [32]
14. (14 sc, dec) * 2 [30]
15. (13 sc, dec) * 2 [28]
16-17. 28 sc [28] (2 rows)
18. (12 sc, dec) * 2 [26]
19. (11 sc, dec) * 2 [24]
20-21. 24 sc [24] (2 rows)
22. (10 sc, dec) * 2 [22]
23. (9 sc, dec) * 2 [20]
24-25. 20 sc [20] (2 rows)
26. (8 sc, dec) * 2 [18]
Fasten off and leave a long yarn for sewing.
Skirt:
With dress color:
Go to the row 13 of the body and join yarn.
1. FLO, chain 3, make 2 dc in every stitch until the end of the row
2. Chain 3, make 2 dc in every stitch to the end of row
3-5. 1 dc in every stitch until the end of row
6. Reverse sc until the end of the row (see here a tutorial on YouTube).
Fasten off.
Head:
1. 6 sc in mr [6]
2. inc * 6 [12]
3. (1 sc, inc) * 6 [18]
4. (2 sc, inc) * 6 [24]
5. (3 sc, inc) * 6 [30]
6. (4 sc, inc) * 6 [36]
7. (5 sc, inc) * 6 [42]
8-9. 42 sc [42] (2 rows)
10. (6 sc, inc) * 6 [48]
11-12. 48 sc [48] (2 rows)
13. (7 sc, inc) * 6 [54]
14-20. 54 sc [54] (7 rows)
Insert safety eyes between row 16 and 17 at the distance of 10 stitches from each other.
21. (7 sc, dec) * 6 [48]
22. (6 sc, dec) * 6 [42]
23. (5 sc, dec) * 6 [36]
24. (4 sc, dec) * 6 [30]
25. (3 sc, dec) * 6 [24]
26. (2 sc, dec) * 6 [18]
Fasten off.
Arms:
(make 2 pieces)
1. 6 sc in mr [6]
2. inc * 6 [12]
3. (1 sc, inc) * 6 [18]
4-6. 18 sc [18] (3 rows]
7. (4 sc, dec) * 3 [15]
8. (3 sc, dec) * 3 [12]
9. (2 sc, dec) * 3 [9]
Stuff with fiberfill until row 9.
10-21. 9 sc [9] (12 rows)
Fold top of arm flat and make 4 sc through both sides across.
Fasten off and leave a long yarn for sewing.
Legs:
(make 2 pieces)
1. 6 sc in mr [6]
2. inc * 6 [12]
3. (1 sc, inc) * 6 [18]
4. (2 sc, inc) * 6 [24]
5. 24 sc [24]
6. (11 sc, inc) * 2 [26]
7-9. 26 sc [26] (3 rows)
10. (11 sc, dec) * 2 [24]
11. (10 sc, dec) * 2 [22]
12. (9 sc, dec) * 2 [20]
13. 20 sc [20]
14. (8 sc, dec) * 2 [18]
15. 18 sc [18]
16. (7 sc, dec) * 2 [16]
17. 16 sc [16]
18. (6 sc, dec) * 2 [14]
19. 14 sc [14]
20. (5 sc, dec) * 2 [12]
21. 12 sc [12]
Stuff with fiberfill until 21 row.
22. (4 sc, dec) * 2 [10]
23-35. 10 sc [10] (13 rows)
Fold top of leg flat and make 5 sc through both sides across.
Fasten off and leave a long yarn for sewing.
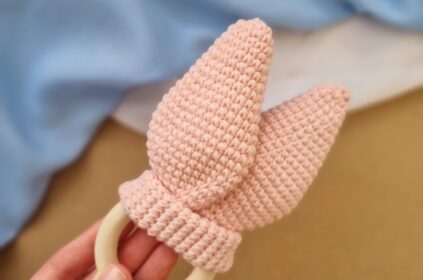
Ears:
(make 2 pieces)
1. 6 sc in mr [6]
2. (1 sc, inc) * 3 [9]
3. (2 sc, inc) * 3 [12]
4. (3 sc, inc) * 3 [15]
5. (4 sc, inc) * 3 [18]
6-16. 18 sc [18] (11 rows)
17. (4 sc, dec) * 3 [15]
18. (3 sc, dec) * 3 [12]
19. (2 sc, dec) * 3 [9]
Don’t stuff with fiberfill.
Fold top of ear flat and make 4 sc through both sides across.
Fasten off and leave a long yarn for sewing.
Bow:
Create a magic ring. Don’t pull off the magic ring.
Make 7 ch, 4 dc, 7 ch and sl st in mr.
The first part of the bow is ready.
Second part:
Make 7 ch, 4 dc, 7 ch and sl st in mr.
The second part of the bow is ready.
Pull off the magic ring.
If you want to make a smaller bow you can check this post which includes step-by-step pattern and also a video tutorial. Enjoy!
How to assembly the bunny:
Sew the head to the body.
Attach and sew the arms to the body on the seam between the head and the body.
Sew the legs to the body on 9th row.
Attach and sew the ears on 5th row of the head.
Sew the bow to the head.
Result:
Thank you for crocheting this beautiful bunny with us and don’t forget to come back for more patterns!
We hope you are enjoying your new crocheted bunny! 🙂
Last modified: February 19, 2024